Home :
![]()
COMPUSAT SUPPORT INFORMATION Configuring CompuSat for use with an IP Video Network
|
|
This page provides support for configuring IP Video Networks in CompuSat.
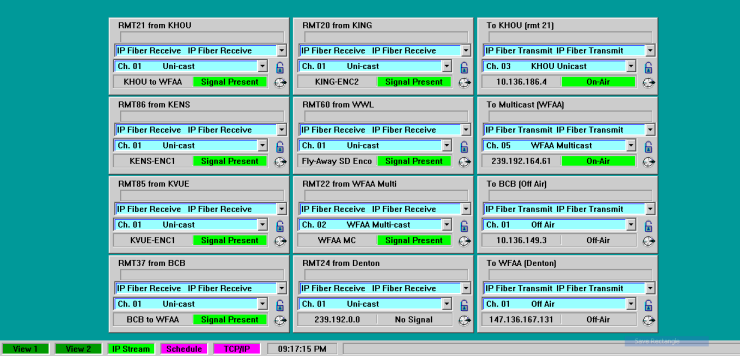
Using interfaces to IP video encoders and IP video decoders, CompuSat may be used to control and automate the transfer of video over appropriate fiber networks. Using the familiar CompuSat receiver type interface, operators select channels from a list of choices to command the encoders and decoders to send and receive video. Timer events may also be defined to automate this process. To this end, the setup involves creating a fixed antenna and attaching a IP satellite to the antenna. The IP satellite defines the channels available to the encoder and decoders. The actual encoders and decoders are then added to the CompuSat site configuration and they are associated with the IP antenna. Here is an example screen of a configured IP network:
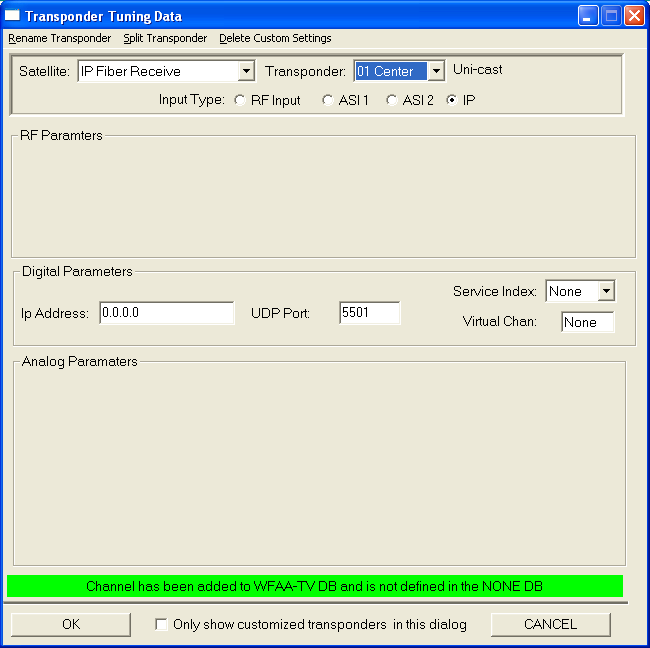
The IP Video Network features are integrated into the existing satellite based infrastructure defined in CompuSat. First we need to create the IP channels that will be presented to the operators. Starting with the JUNE/JULY 2010 satellite database, CompuSat predefines two "satellites" called IP Transmit and IP Receive. On the receive side, select Database/Transponder Tuning Data.
Next pick IP Receive for the satellite and 01 Center for the transponder. This channel is predefined in the factory database.
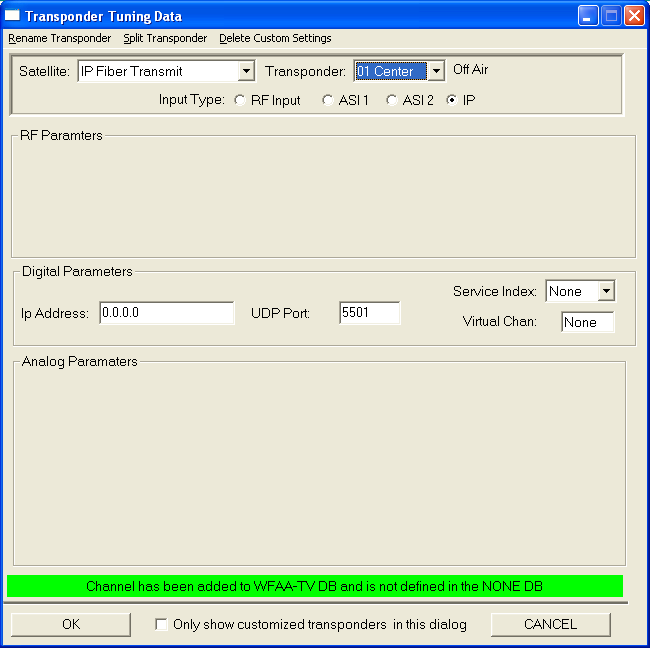
A brief discussion of the Tandberg decoders we support will make this easier to understand. Each decoder has two IP addresses used to receive IP video. The first is called the uni-cast IP address. This is the address an encoder sends to if this is the only receiver that should get this feed. The second is the multi-cast IP address. This is the address used if this receiver is just one of many decoders that may receive the broadcast. CompuSat never touches the uni-cast IP address. We add a single channel to the database for uni-cast reception. This channel sets the multi-cast address to a non-working address and the UDP port to the uni-cast UDP port number. In this mode, the decoder will receive any feeds sent from any encoder to its uni-cast IP address. The settings needed for uni-cast receive are show above. NOTE: When the decoder IP address shows --.--.--.-- from the web browser or front panel interface, CompuSat cannot set the IP address. You must manually enter an address from the front panel the first time. Next we will make as many multi-cast channels are needed. We will need a channel for each possible multi-cast location in the network. The multi-cast channels are the same except the IP address is the IP address of the multi-cast encoder and the UDP is the multi-cast UDP port number. To add a new channel, pick a new channel from the transponder list. Use the Rename menu choice to assign an appropriate name. Clip on the IP radio button to define the input type for this channel and then enter the multi-cast IP address and UDP port number. For the transmit side, the factory database predefines the Off Air channel. This channel is used to turn off the encoder. Add a channel for when the encoder is in multi-cast mode and a channel for each uni-cast location that may be used to send video to an individual decoder. Channel 1 must be used for the off channel as CompuSat will automatically go to channel 1 when a timer event on the encoder is finished. The off channel is defined below:
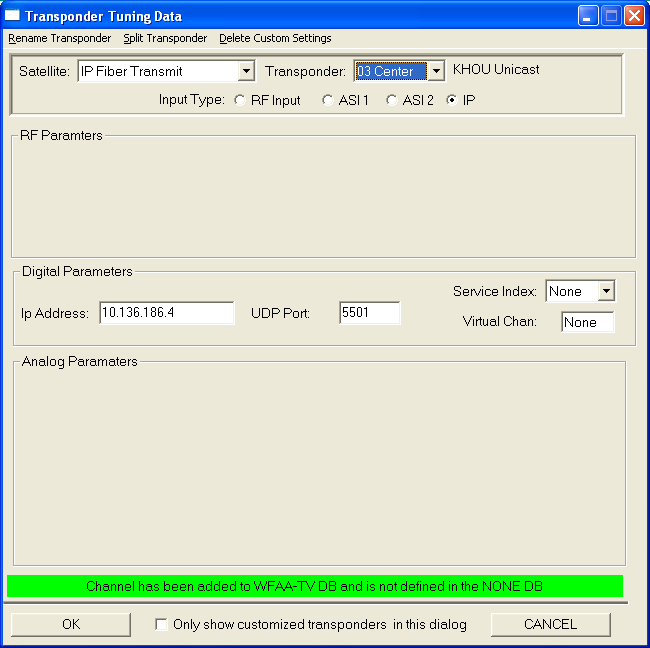
Next we define the multi-cast channel and all the uni-cast channels needed for the encoders. An example uni-cast channel is shown below:
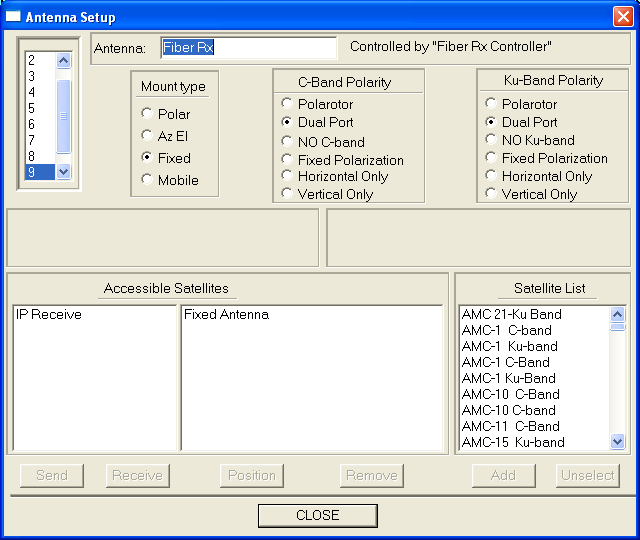
Once we have created all the transmit and receive channels needed, we can add the IP devices to CompuSat. Configuring IP decoders and encoders We are now ready to add the encoders and decoders to the site configuration for CompuSat. First we are going to add two antennas; one for transmit and one for receiver. This is the normal process of adding a new antenna to the CompuSat site data. Detailed instructions can be found here. If yo do not have any encoders in your system, you only need to add the receive antenna. For the receive antenna, add the IP Receive satellite to the accessible satellite list. For the transmit antenna, add the IP Transmit satellite.
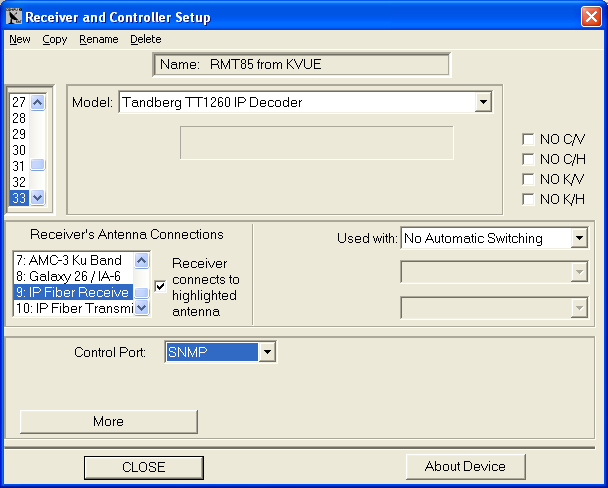
Repeat these steps for the transmit antenna if needed. Next we need to add each decoder and encoder you want to control. These are added using the same procedure as adding a normal satellite receiver. We will attach all the decoders to the Receive Antenna and all the encoders to the Transmit Antenna. Decoder Example:
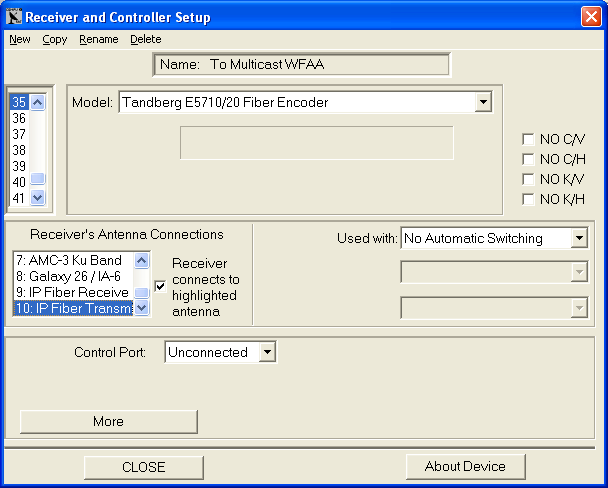
Encoder Example:
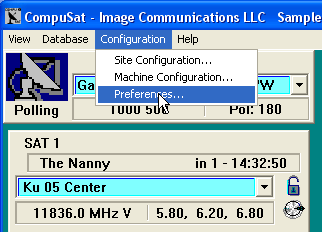
The new software will allow you to define multiple views. You can use this to create a separate page for the IP video devices. Go to Configuration/Preferences:
And then click Drawing Preferences to display the Drawing Preferences dialog:
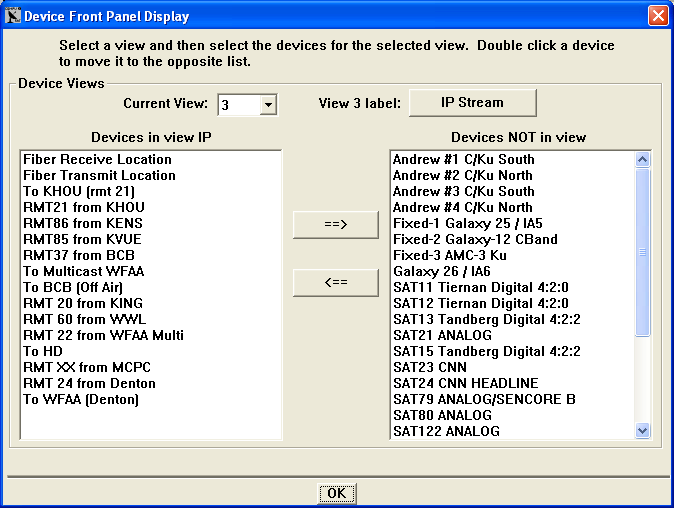
Next click Define Views to display:
From here, you can define views, add or remove equipment for a view and name the view. |

Any questions? Call Image Communications, LLC @941-322-2534 |
| Contact Us | Copyright © 1991-2008 Image Communications, LLC | Image Communications, LLC |