Home :
![]()
COMPUSAT SUPPORT INFORMATION Configuring CompuSat for use with an RF Matrix
|
|
This page provides support for configuring RF Matrix support in CompuSat.
The RF matrix support causes CompuSat to automatically switch the feed from the proper LNB on the desired antenna to the RF input of the selected receiver. The operators never have to interact directly with the RF Matrix when changing channels on a receiver.
Adding a matrix to an existing operation When adding an RF Matrix to an existing satellite system, care and planning are required to keep the operation running during the transition. Your matrix should be installed in the racks and RF cables run from each antenna LNB to the inputs of the matrix LNB power. If possible, leave the existing lines with the splitters feeding the existing receivers. RF cables should also be run from the matrix to each receiver on the matrix. Leave these cables connected on the matrix side and ready to connect to the receiver. Once we configure the matrix and set the auto switching, we can set each RF cable in place when we configure the receiver in CompuSat. Use the device installation papers for your specific RF matrix to install your matrix into CompuSat. Go here for specific device information and control cabling information. When you are finished, your matrix should appear as a button on the CompuSat task bar.
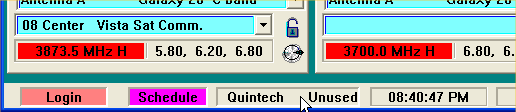
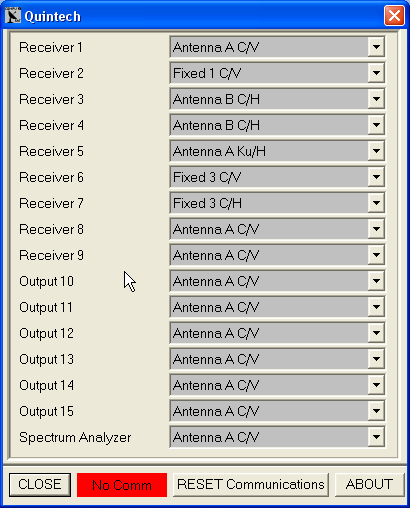
Clicking the RF Matrix button (Quintech), will display an XY panel based on the size of your matrix.
The destination (the receivers) are listed on the left hand column. The current LNB routed to the receiver is shown in the pick list for each receiver. Here are the basic steps. NOTE: You must be logged in with administrator rights to access the site configuration dialog.
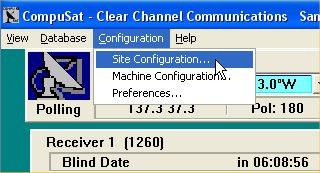
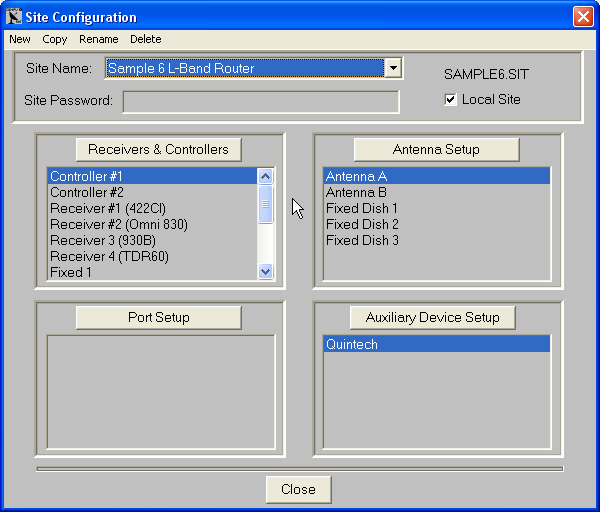
When you select Site Configuration, the following dialog is displayed:
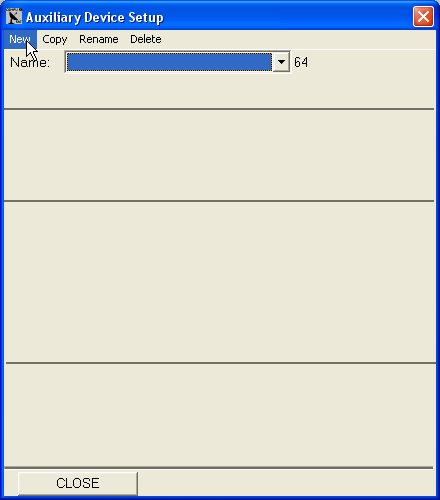
Click the Auxiliary Device Setup button:
Then click the New button.
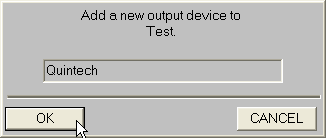
Enter a name for the matrix and click OK.
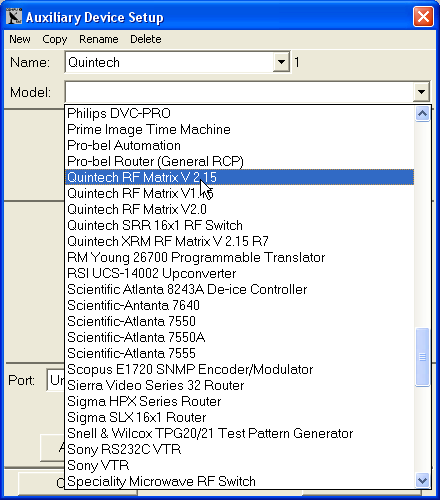
Select the model for your matrix by clicking on the Model pick list.
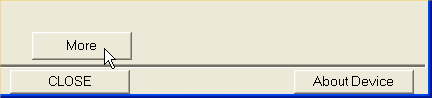
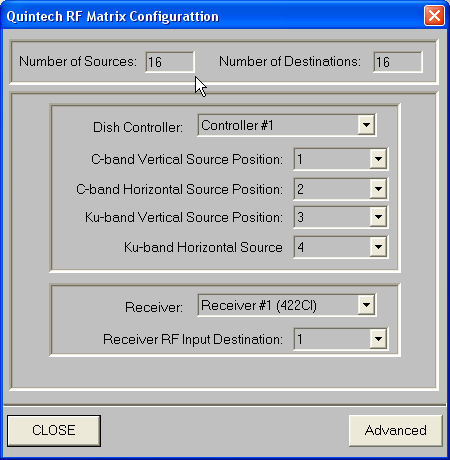
Next, click more to display the specific settings for your matrix. Among other settings, we set the matrix size in the More dialog for the RF Matrix configuration.
Enter the number of sources and the number of destinations for this matrix. We will revisit this page for the automatic switching setup. For now, click Close to return to the matrix configuration screen.
Set the Off Line Warning setting to Disable Off Line Warning. This can be used if you are experiencing connection problems with the router and you want CompuSat to alert you to the problem. Next we are going to supply labels for all the matrix sources (Antenna LNB's) and the matrix destinations (receivers). Note: The Evertz routers allow CompuSat to read the names stored in the matrix. If the Evertz matrix is already setup, skip the naming section below. See the specific Evertz documents for details. With the Position field set to Router Position: 01, type a name for the first source on the matrix in the Input Name field. This is the name you have assigned to the first input on the router. Normally, we will name the input based on the antenna and the LNB, The first name might be Dish 1 C/V for the C-band vertical feed of Dish 1. CompuSat defaults the order as C/V C/H Ku/V Ku/H. It does not really matter however, everything is configurable. Click on the Position pick list and select the next router position, Position 02. Type a name for the second source on the matrix in the Input Name field. This is the name you have assigned to the second input on the router. Going with the above example, perhaps Dish 1 C/H. Repeat this to enter the names of all the matrix sources. HINT: Using keyboard shortcuts can greatly reduce the time required to enter a long list of names. With the Position field highlighted, press the <TAB> field to advance the target field to the Input Name field. Type a name for the source position. Press the<Shift Tab> field to return the target field to Position. Press the <Down arrow> key to advance to the next position. Press the <TAB> key to advance the target field to the Input Name field and we start all over again. Using these keys, you can enter all the names without leaving the keyboard.
Repeat the above steps but this time enter the Output Name field labeling all the destinations. Select Position 01 and enter a name in the Output Name field. These names should be mostly receiver names. The outputs of the matrix are mostly connected to receivers, one output per receiver. By convention, we reserve the last output for a spectrum analyzer. The next step to to edit the configuration of each satellite receiver connected to the matrix. We need to tell CompuSat which antenna's each receiver can access and how to switch which RF on the receiver to use. We will be configuring all the multi port receivers to use RF port 1. Follow these steps. NOTE: You must be logged in with administrator rights to access the site configuration dialog.
When you select Site Configuration, the following dialog is displayed:
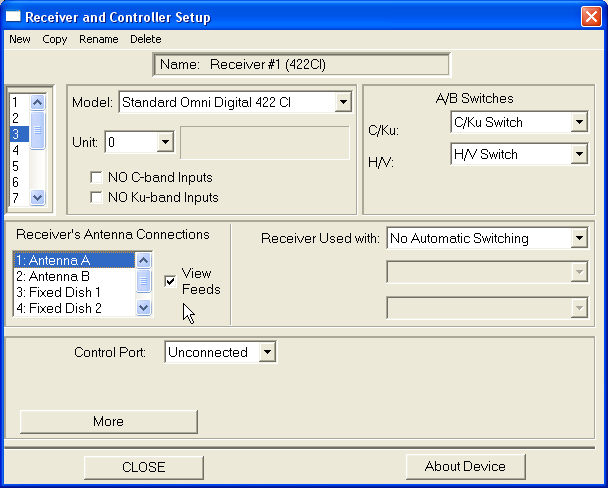
Scroll down the list of device names in the upper left hand list under Receivers & Controllers and find the first receiver you want to configure for use with the matrix. Highlight the desired recorder name and click the Receivers & Controllers button or simply double click the receiver name. The Auxiliary Device Setup window is displayed, opened to the selected recorder:
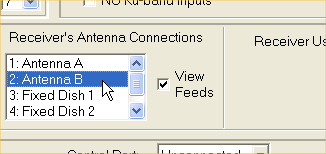
The Receiver's Antenna Connections controls which antennas this receiver can access. The display above is showing Antenna A highlighted and the View Feeds checkbox is checked. This indicates that the receiver has access to this antenna.
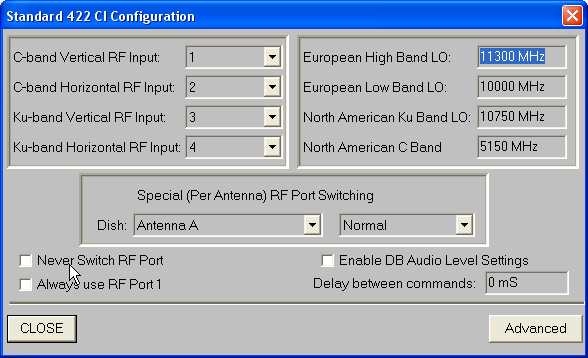
The View Feeds checkbox will display the status for the highlighted antenna, changing as you highlight different antennas. Make sure all the View Feeds is checked for each antenna on the matrix. The More dialog is where we find RF switching configurations. Each of these dialogs is specific to the receiver model. Please refer to the receiver's specific documentation for details. Here is an example of a screen display after clicking the More button.
There are several ways we could make CompuSat always use RF port 1, the easiest would be to check the Always use RF Port 1 checkbox. NOTE: You must do a Reset Communications on the device after changing anything in the More dialog.
ConfIgurE Automatic Switching The final step is adding the automatic switching. You do this be editing the More dialog of the RF matrix configuration.
When you select Site Configuration, the following dialog is displayed:
Highlight the RF matrix device in the lower right hand Auxiliary Device Setup list. Click the Auxiliary Device Setup button or double click the RF matrix device name to open the auxiliary device setup window.
Click on the More button
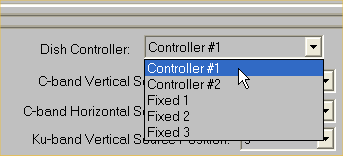
Click the Dish Controller pick list and select the first antenna on your matrix.
Enter the matrix input number for each band of the antenna. If the antenna does not have one of the bands, just enter none. Matrix colors You may color code the antenna names in the CompuSat Front Panel display. When a receiver is switches to view the antenna, the receiver's name will be shown in the antenna's color. This give you a visual way of quickly determining which receivers are currently attached to any antenna. You can do this automatically by changing a preference.
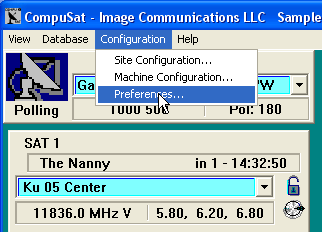
Select Configuration and then Preference to open the preferences window.
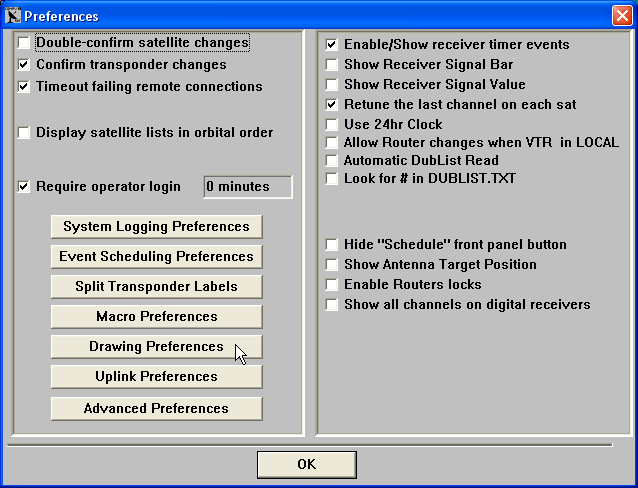
Click the Drawing Preferences to display:
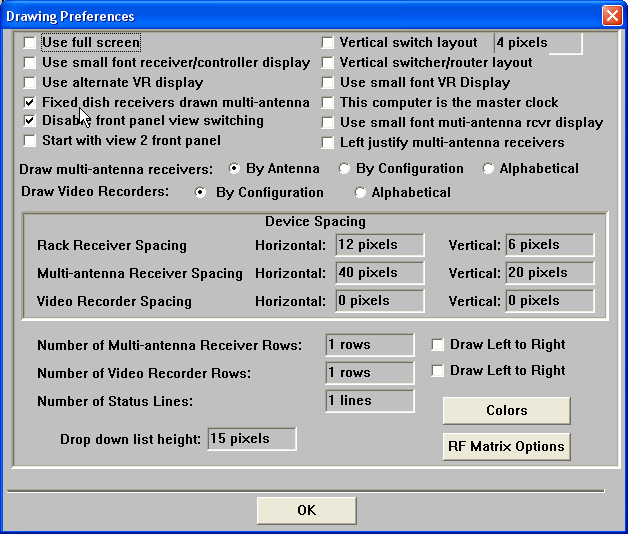
Next, click on RF Matrix Options.
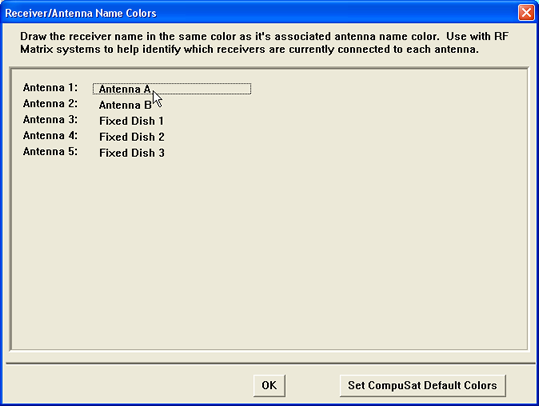
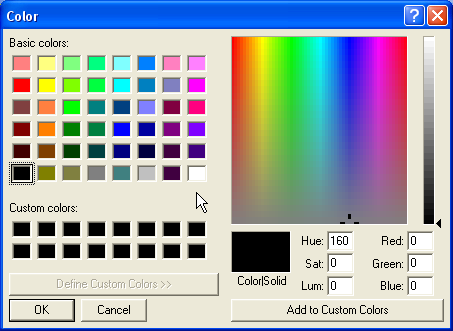
Clicking the name of any of the antenna's will display the WIndows color menu.
Click on a color or adjust an existing color and click OK. The antenna name will now be drawn in this color as well as any receivers currently connected to this antenna.
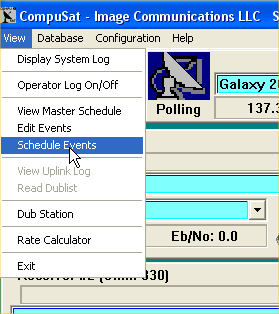
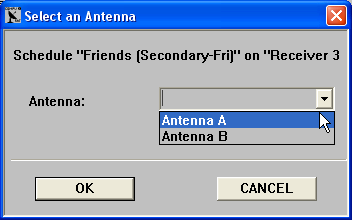
Timer Events Existing timer event schedules will need to be modified. Previously, the antenna associated with a receiver was known and always the same. With the RF Matrix, the antenna a receiver uses may change. When scheduling an event on a system with an RF Matrix, CompuSat will ask for the antenna to use for each receiver that is scheduled. The easy way to update your existing schedule is to open the event scheduling window.
Click Schedule Events displays:
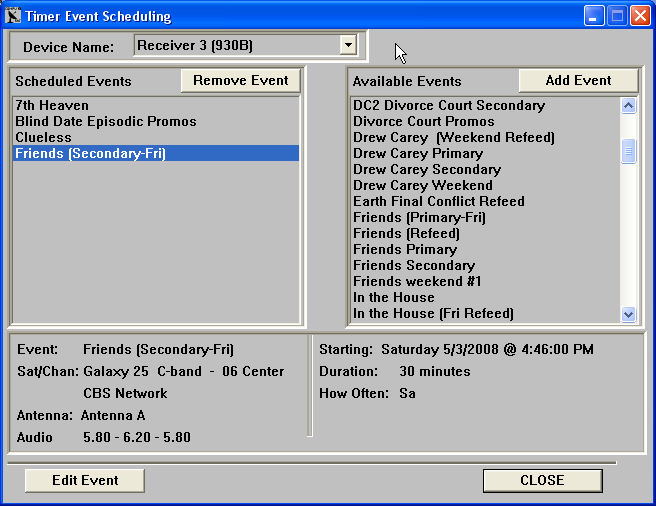
Select a receiver in the Device Name field. Now, for each event in the left hand scheduled events list, double click the name to remove it (jump to the right hand list) and then double click it again when it is in the right hand list to re-schedule the event on the receiver.
For now, select the antenna the event used to be on (because the receiver was fixed to a certain antenna). Repeat this for all event scheduled for the receiver and for all receivers on the matrix. Once the transition is complete, you should start organizing your feeds to take full advantage of your matrix. Any time an event can be covered using a fixed antenna, always select the fixed antenna when selecting an antenna. This will save the movable antenna for other uses. Always schedule feeds on the same satellite using the same antenna when possible. This will keep your antenna's from moving around so much leaving larger windows for unexpected events.
|

Any questions? Call Image Communications, LLC @941-322-2534 |
| Contact Us | Copyright © 1991-2008 Image Communications, LLC | Image Communications, LLC |