Home :
![]()
COMPUSAT SUPPORT INFORMATION Digital Satellite Receivers
|
|
CompuSat represents digital receivers in exactly the same way as it represents analog receivers, which means that you access the receiver's details in its monitor screen from the CompuSat front panel, and in the transponder database that CompuSat manages for you.
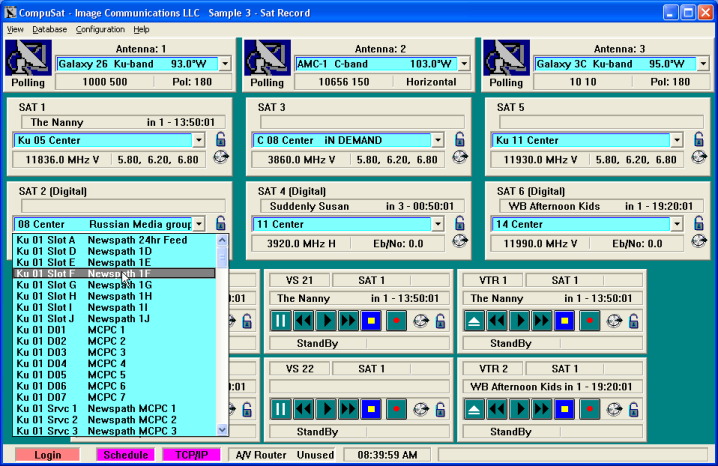
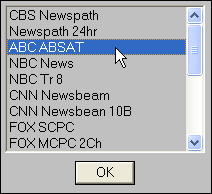
To tune a digital channel, click the receiver’s transponder pick list and select the desired channel as shown here:
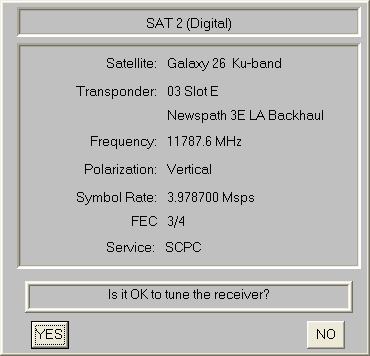
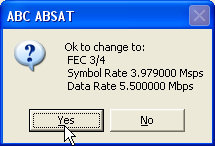
When you select a channel to tune, CompuSat displays the channel change confirmation window:
Once you confirm the change, the receiver is tuned to receive the desired signal. Once the receiver locks on a digital stream, the Eb/No display for the receiver turns green to let you know the stream is locked in, and the Eb/No changes to reflect the current signal.
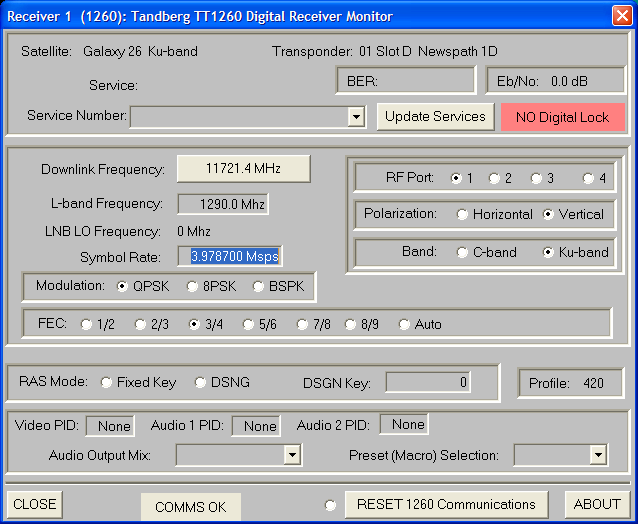
Using the Receiver Monitor for Fine Tuning CompuSat creates a receiver monitor screen for each receiver in your configuration; you can use this screen to review or modify the digital tuning parameters. To access the monitor screen for a receiver, click the silver tuning knob in the receiver's display on the CompuSat front panel. Here's a typical receiver monitor screen:
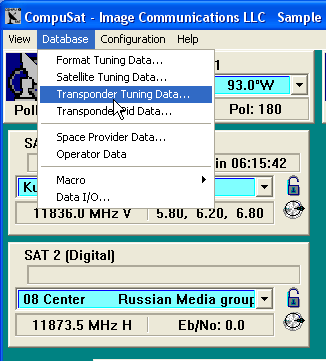
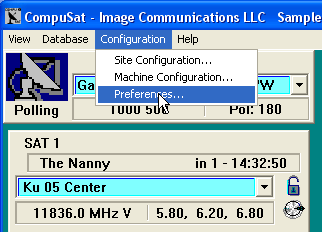
The controls available on a receiver's monitor screen is specific to the receiver model. Using the Transponder Database You can modify the database that Image Communications, LLC provides for use with CompuSat. To view the settings for any channel, open the transponder database by selecting Database/Transponder Tuning Data from CompuSat's Database menu, as shown here:
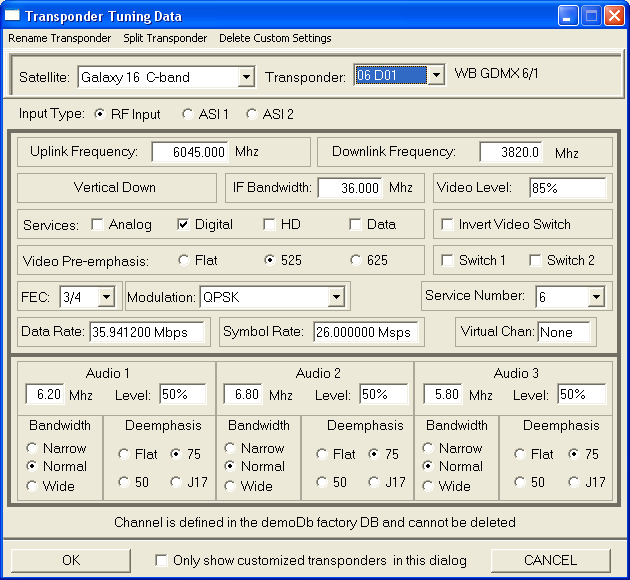
CompuSat displays the transponder database. For example:
To display tuning parameters for a transponder, select the satellite and transponder. CompuSat displays the name of the transponder to the right of its number and label. The label above the OK button shows where (in which database) the transponder is stored: this can be the factory database, your custom database, or a customized version of a factory-defined transponder. Digital Channel Labels CompuSat uses the following conventions for the digital channel labels:
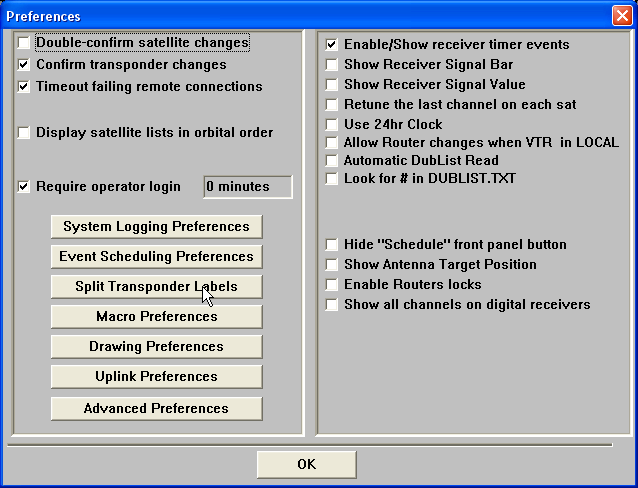
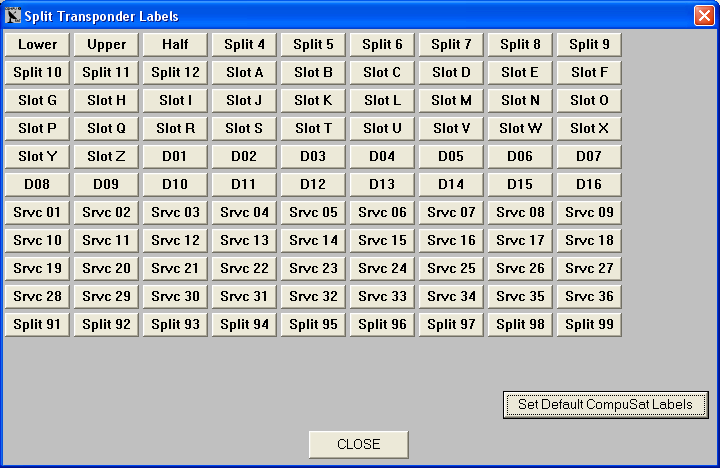
All digital transponders also have various other turning parameters such as symbol rate, data rate, FEC, and modulation type. These are all represented in the transponder database and are set when a digital channel is tuned. Split Transponders in the Factory Database The Factory Database provided by Image Communications, LLC, defines transponder selections for many popular digital services. CompuSat appends a label to the transponder number for channel names. These names are defined in the split transponder labels. For example, SCPC channels are labeled with Slot A type designators, and MCPC channels are defined with Srvc 1 type designators. Transponder labels also include D01 (Digital 01) type labels when a transponder is divided many ways. To set the default labeling style for split transponders, follow these steps:
Adding Channels to the Database You can add digital transponders to your custom database. Follow these steps:
You can use digital macros to quickly switch the basic digital parameters when using an ad hoc channel. To access a digital macro, click the Eb/No field on any digital receiver display in the CompuSat front panel, then select the macro from the list that's displayed:
When you select a macro to use, CompuSat displays the digital macro changes confirmation window:
Adding a New Digital Macro To add a macro, follow these steps:
|

Any questions? Call Image Communications, LLC @941-322-2534 |
| Contact Us | Copyright © 1991-2008 Image Communications, LLC | Image Communications, LLC |